

Introduction
Julep’s Open Responses is a self-hosted, open-source implementation of OpenAI’s Responses API that works with any LLM backend. It provides a lightweight interface for generating content with Large Language Models (LLMs) without needing to create persistent agents or sessions.To try it out, just run
npx -y open-responses init (or uvx) and that’s it! :)What is Open Responses?
Julep’s Open Responses lets you run your own server that is compatible with OpenAI’s Responses API, while giving you the freedom to use alternative models like:- Anthropic’s Claude
- Alibaba’s Qwen
- Deepseek R1
- and many others …
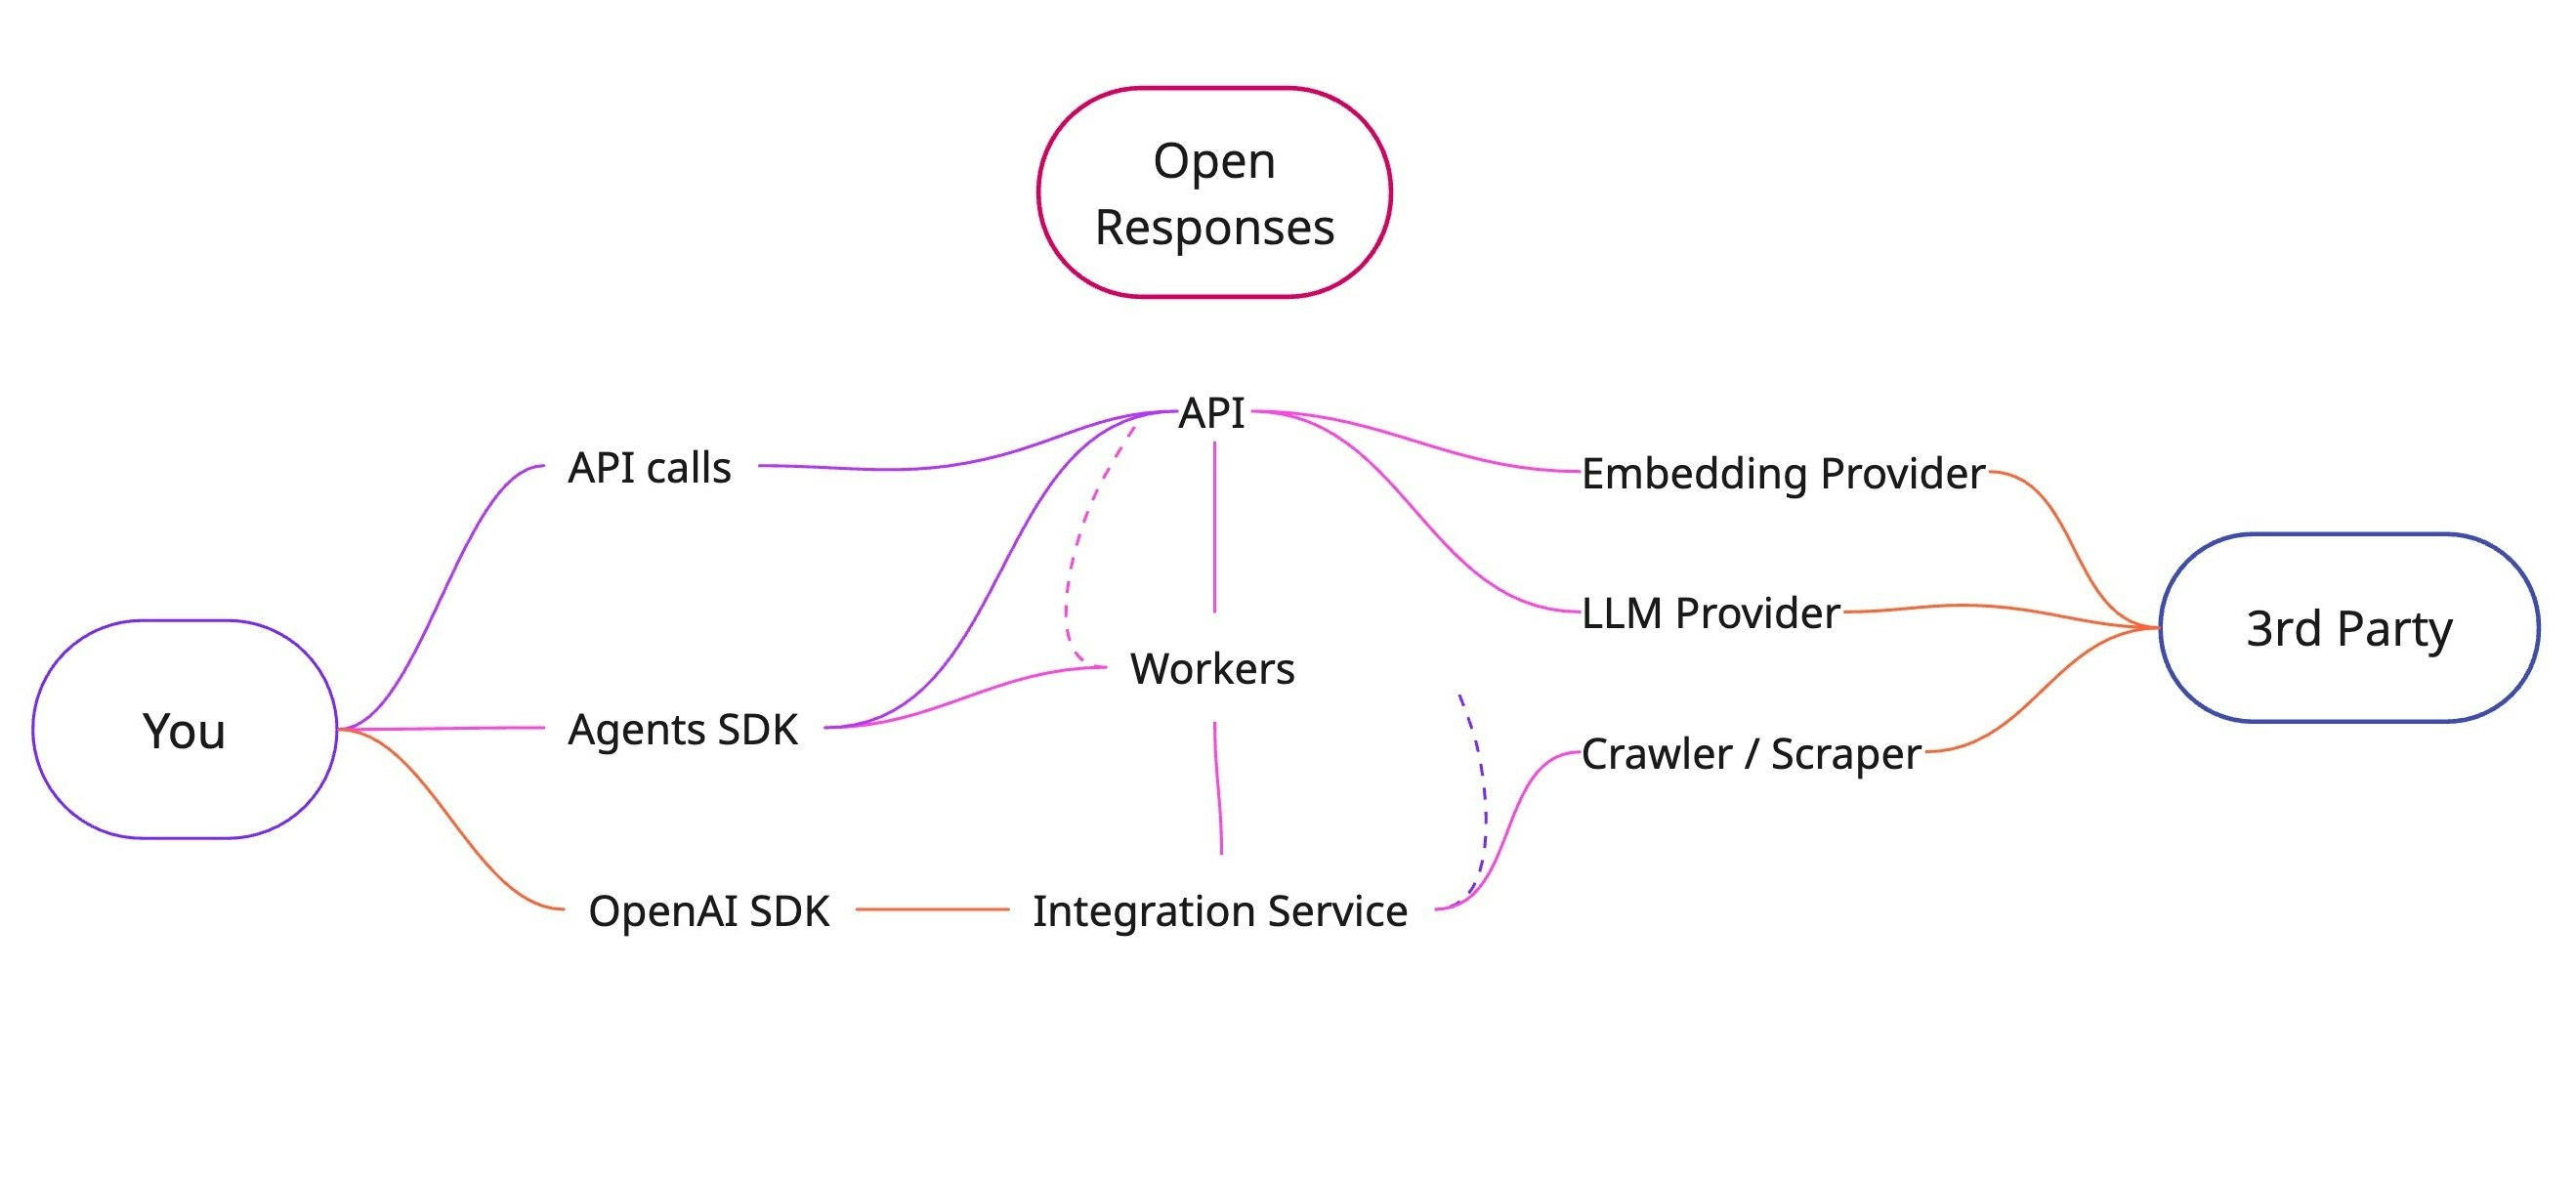
Open Responses API Overview
Why Open Responses?
- Model Flexibility: Use any LLM backend without vendor lock-in, including local model deployment
- Self-hosted & Private: Maintain full control over your deployment on your own infrastructure (cloud or on-premise)
- Drop-in Compatibility: Seamlessly integrates with the official Agents SDK by simply pointing to your self-hosted URL
- Easy Deployment: Quick setup via docker-compose or our CLI with minimal configuration
- Built-in Tools: Automatic execution of tool calls (like web_search) using open & pluggable alternatives
Local Installation
This section will guide you through the steps to set up the Julep’s Open Responses API.Prerequisites
Install DockerInstallation
The Julep’s Open Responses API is a fully microservice-based architecture. It is fully dockerized and can be easily deployed on any infrastructure that supports Docker. There are two ways to install the API:Docker Installation
1
Create a directory for the project
2
Navigate to the project directory
3
Download and edit the environment variables
.env file with your own values.4
Download the Docker Compose file
docker-compose.yml. This is the file that will be used to run the Docker containers.5
Run the Docker containers
6
Verify that the containers are running
CLI Installation
The CLI is a lightweight alternative to Docker for those who prefer not to use Docker directly.Internally, it uses Docker to run the containers.
1
Install the CLI
You can install the CLI using several package managers:
2
Setup the Environment Variables
3
Run the CLI
To learn more about the CLI one can use the checkout the CLI Documentation.
Quickstart Example
With the OpenAI SDK initialized, you can now use the Responses API to generate content.API Key Configuration
RESPONSE_API_KEYis the API key that you set in the.envfile.
Model Selection
- While using models other than OpenAI, one might need to add the
provider/prefix to the model name. - For supported providers, see the LiteLLM Providers documentation.
Environment Setup
- Add the relevant provider keys to the
.envfile to use their respective models.
1. Install the OpenAI SDK
2. Initialize the OpenAI client
3. Generate a response
Next Steps
You’ve got Open Responses running – here’s what to explore next:- Learn more about the Open Responses API Examples – To learn how to use the Responses API with code examples
- Learn more about the Open Responses API Roadmap – To see upcoming features including:
- Learn more about Julep - To learn more about Julep and its features
- GitHub - To contribute to the project